Thursday 31 May 2012

United Bakes of America Round One... and a Key Lime Pie for the state of Florida!


So to kick off the United Bakes of America challenge...I baked the Key Lime Pie from Warren Brown's fantastic book.  

Let's start by talking about how this amazing little pie came to be.  One of my favourite parts of this book is hearing all the little back stories that go along with each dessert.  It obviously originated in Southern Florida and we all know that Florida gets pretty hot so back in the mid 1800s before refrigeration it was impossible to keep fresh milk.  So in stepped sweetened condensed milk - in fact Key Lime Pie is directly linked to the development of it, so we owe a lot to Key Lime Pie! 

Key limes themselves are actually native to Malaysia, they were brought over to the Caribbean in the 1500s by the Spanish and from there they made there way over to Florida.  They are smaller than Persian limes, usually the size of walnuts and they have green-yellow skins and so are definitely distinguishable from Persian limes.  


One thing I knew for sure was that I wanted to make it authentic, I'm talking real key limes! I was in contact with Whole Foods who told me they could get in key limes whenever I wanted but unfortunately it came to nothing in the end.  I scoured every American grocery website for Key Lime Juice but was coming up with nothing.  I even contacted a very famous cupcake company here in the UK who sells both Key Lime Pie and Key Lime Cupcakes to ask them where they get their Key Lime Juice from only to be told that they just use regular limes and it works just the same!

I was a little bit dismayed! I am fully aware that using regular limes would still produce something edible but then it would just be Lime Pie and not Key Lime Pie.  That would be like me making an apple pie with Granny Smith Apples and then calling it a Bramley apple pie - that just wouldn't make any sense! so why do people continue to use the title Key Lime when they have in fact used regular limes! So I took matters into my own hands and called on my amazing friend Kathi, remember I told you she helped me out a few posts back - well this Key Lime Juice arrived at my house no less than a week after I sent out a desperate plea of help for some! and I haven't stopped baking with it since!


I was SO excited to bake a REAL Key Lime Pie! so of course since I was going all out I had to make my own homemade graham crackers too so it could have an authentic graham cracker crust!

It was definitely worth all the effort involved! I made it for my mom's birthday last week as she is a huge Key Lime Pie lover and we all agreed that we could definitely taste a difference and that it was the best Key Lime Pie I've had while in the UK. Who could turn down a creamy tart filling on a crunchy graham cracker base topped with soft meringue?

Also, you may notice that my filling was yellow.  Authentic key lime filling is always creamy yellow and should never under any circumstance be tinted green - that's a direct order from Mr Brown and since he knows more than a thing or two I was more than happy to follow his orders!


Key Lime Pie:
Serves 16
From United Cakes of America

For the crust:
200g graham crackers
3 tbsp caster sugar
100g unsalted butter, melted
1/8 tsp salt

For the filling:
2 large eggs
2 egg yolks (save the whites too)
1 tin (396g) sweetened condensed milk
1/2 cup key lime juice

For the meringue:
2 egg whites
1 tbsp caster sugar

Preheat oven to 150 degrees C.
Grease a 9x3" round pan and line the bottom with parchment.
Crush crackers into crumbs in a blender, or with a rolling pin and a zip loc bag.  Toss them with the melted butter and sugar until combined and press the mixture firmly into the base and the sides of the pan.
Bake for 10 - 12 minutes.  Set aside to cool.

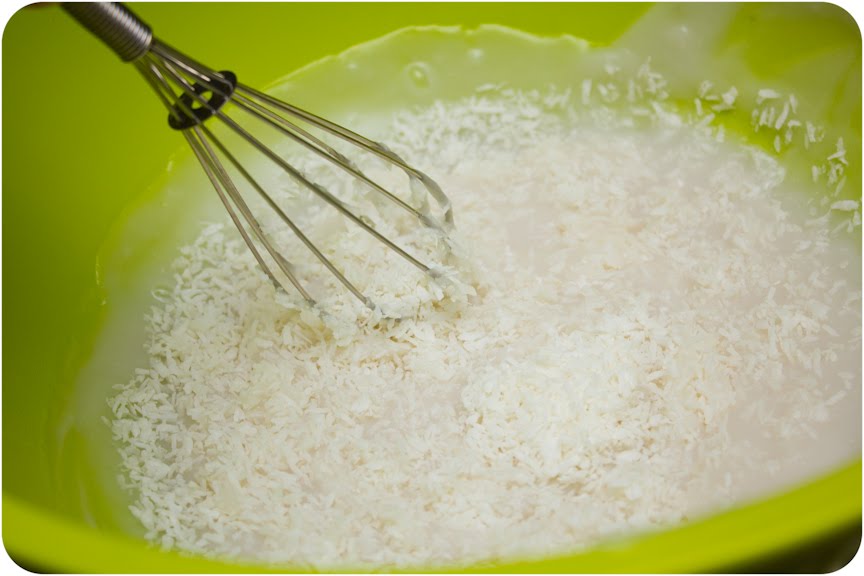
Beat 2 whole eggs and 2 yolks lightly with a whisk (set aside your 2 whites for the meringue).  Add condensed milk and whisk until blended.  Whisk in Key Lime Juice slowly, as you add it the custard will thicken.  Pour the filling into the pre prepared crust.  Set the pan in a water bath with 1/3 warm water surrounding the pan (I didn't do this and my filling turned out fine).  Bake until filling is lightly browned on top and doesn't jiggle when gently shaken.  Let cool to room temperature.

Turn the oven up to 200 degrees C.
Beat the two reserved egg whites with a wire whisk in a free standing mixer until stiffened.
Drizzle in the sugar and continue to whip until stiff peaks form.  Arrange meringue on top and place the pie in the oven to lightly brown the top, about 5 minutes.  

So there you have it a Key Lime Pie for Florida....

and what do you do with leftover homemade graham crackers - whip up some s'mores of course! yum!


now let's get on to checking out the other amazing American treats that were baked up this month by all the awesome bloggers who entered the United Bakes of America!

First up was Ros from The More Than Occasional Baker with these absolutely drool worthy Hershey's Cookies 'n' Cream Brownies.  She made a recent trip to Asda and was impressed by their array of baking goodies especially their American ones so she picked up a bar of this Cookies 'n' Cream chocolate and baked it into the middle of some moist, fudgy and delicious brownies - sounds like a winning combo to me! 


Next up were some awesome Oreo Surprise Cupcakes by Cakes from Kim, despite not being a biscuit person and preferring a digestive even when she does indulge in the odd biscuit (I know what a shocker!) Kim has developed an Oreo obsession (haven't we all!) So when the theme for her first Clandestine Cake Club was favourite things she whipped up an Oreo layer cake and made these Oreo cupcakes too, complete with a whole Oreo cookie waiting to surprise you at the bottom - now that is the kind of surprise I'm talking about! 


Charlotte from Lottie's World of Cakes and Bakes whipped up this very elegant Hershey's Kisses Chocolate Tray Bake.  Not only did she pipe row upon row of beautiful pink and brown ruffle frosting but she finished off her tray bake by strategically placing Hershey's Kisses all over it! which I thought was a rather inspired way to use those little Kisses! and these extra special Kisses actually came all the way from New York! now that's a well travelled Kiss! 


Kit at I-Lost in Austen baked up this stunner of a Rose Chiffon Cake.  The Chiffon cake was apparently invented by Harry Baker in my favourite place in the whole world - California - back in 1927.  I have never had a Chiffon Cake myself, but it is meant to be known for being light and fluffy with moist crumbs that just melt in your mouth - doesn't that just sound dreamy! 


Susie from Fold in the Flour made this very impressive Jubilee Royal Velvet Cake.  I know you may be thinking what's American about that! but actually if you took away the crown and the Union Jack flags it could very well be a Patriotic dessert for any American themed bash with it's red, white and blue layers of velvet cake! Not only that, but the recipe used came from Sprinkle Bakes - an amazing American blogger  from Tennessee who invents the most show stopping cakes! Susie made the blue sugar crown on top herself and I think it adds a definite flair to the overall finish! 


Cake Fairy baked up our 3rd Oreo offering which I was only too glad to see because in my book you can never have enough Oreo treats! This Chocolate Oreo Cake has ground up Oreo crumbs in the cake and is sandwiched with some Oreo cream cheese frosting, I love the colour of it - you can tell there's a bit of Oreo overload going on in there! 


The final bake was sneaked in by my sister Mara who blogs over at Creative Crafter.  She made Chanterelle Choc Chip Cookies, from a new recipe book she picked up by Kate Zuckerman, a New York pastry chef.  She said don't let their appearance deceive you, as they are super crispy and chewy and make your house smell heavenly whilst they are baking! 


I loved seeing all the American inspired bakes you came up with this month! and cannot wait to see what next month brings! 

I will be planning to bake Smith Island Cake which originates from Maryland next month.  
You have the whole month of June to join along with me with any American ingredients or American recipe or State inspired dish you can come up with.  Email it to me by June 30th to be included in the round up.  
If you're new to United Bakes of America, then there's a reminder of the rules here.

Monday 28 May 2012

Mango Coconut Cream Pie


I am really consciously trying to spread out my coconut posts! but the fact of the matter is everything I have been baking recently is coconut related so you're just going to have to bear with me for the next few weeks if you are a coconut hater - I know it tends to evoke strong reactions from people! 

I actually baked this pie waaaay back over the Easter break.  We had a little Caribbean night at my parents house with Jamaican goat curry from my husband and some mango and lime cordial we had bought at a farmers market, so I decided a Mango & Coconut Cream pie for dessert would finish off the night nicely! 


I also had fun using my sisters iphone to snap a few pictures as I went along! I could eat juicy Mango everyday of my life and not get sick of it - it's delish! 


After making the coconut cream filling, desiccated coconut gets stirred in...


and then the mango gets mixed in.  


This is all put on a hobnob biscuit base and left to set in the fridge.


Whipped cream and a sprinkling of toasted shredded coconut finished it off, and I even caramelised a few bits of Mango too.


The filling wasn't quite as firm as it typically is when I have made Coconut Cream Pie in the past, I think the moisture from the mango must have affected it so I would probably suggest adding some more cornflour to the recipe below to help it become firmer.  

This is a perfect bake for those summery days to take you away to somewhere more tropical! 

and don't forget there are only 2 more days left for you to enter your American inspired bakes for the United Bakes of America challenge

Mango Coconut Cream Pie:
Serves 14-16
Adapted from Cupcake Crazy Gem

Base: 
300g Hobnobs/crushed biscuits
110g unsalted butter (melted)

Filling:
 140g caster sugar
30g corn flour
240g coconut milk
240g whole milk
10g vanilla bean paste
30g unsalted butter (cut into cubes)
60g/3 egg yolks
60g/1 large egg
160g fresh mango, chopped into cubes
50g desiccated coconut 

Topping:
475g double cream
80g coconut milk
56g caster sugar
 A handful of shredded coconut (toasted)

75g chopped mango

2 tsp caster sugar
1 tsp lime and mango syrup

Preheat oven to 150 degrees c.

Melt butter in a pan on the hob (or in microwave in short low heat bursts).  Crush your biscuits up in a food processor.  Mix the butter into the biscuits and spread your biscuit base into your pan.  Bake in the oven for 20 minutes.

Whilst that is baking, pre mix the caster sugar and the corn flour together with a whisk in a saucepan.  Add the coconut milk, whole milk, vanilla bean paste, butter, egg yolks and whole egg into the pan as well.  Heat all ingredients on a medium-high heat on the hob for 5 minutes, or until all of the butter has melted and all the ingredients are well mixed together.  Mix for a further five minutes until the mixture thickens (the original method I followed instructed you to do figure of 8's with your whisk at this point, I'm not sure if it's actually necessary but I did it anyway!).

Remove your pan from the heat.  Leave the filling to cool.  Add the desiccated coconut and stir it in. Chop up mango into cubes and add it to the coconut filling. 

Pour it into your biscuit base that you have removed from the oven.  Leave it to firm up in the fridge for an hour or overnight.

Sprinkle a few handfuls of shredded coconut or however much you would like for your decoration on to a baking tray.  Place it under the grill and watch it as it can burn very quickly! You want it so that it is lightly toasted, with some pieces brown but not necessarily all pieces.  Approx 3-5mins.  Take out the oven and leave to cool.

Add the double cream and coconut milk to your mixer.  Whip on medium speed until it begins to thicken. Add the caster sugar a little at a time, increase the speed to high and whip until stiff.  

Remove your pie from the fridge and top with the coconut cream.  

Sprinkle the now cooled toasted coconut on top.

In a small saucepan, add the chopped mango, caster sugar and I used a teaspoon of the lime and mango cordial but a teaspoon of water would also work fine.  Heat until it is just about to boil.  
Once cooled sprinkle the caramelised mango in the middle of the pie.

Eat and enjoy! 

Thursday 24 May 2012

Introducing The Coconut & Raspberry Milkshake


Most of my daydreaming revolves around coconut, no surprises there! In my opinion coconut and raspberry is one of the all time best flavour combos, as evidenced by the coconut and raspberry cupcakes I've made before and the coconut and raspberry brownies.  So in my mind a coconut and raspberry milkshake needed to be created! I say created because you go and search on google, pinterest and wherever else you choose and I'm pretty sure you won't find one - I certainly couldn't! which is shocking to me! So here making it's debut, is one of the tastiest milkshakes ever...perfect for this summer we're finally beginning to experience!


I loved the coconut flavour of this shake so much I'm already dreaming up the next variations - coconut and pineapple? coconut and lime? coconut and chocolate...hmmm! the possibilities are endless!

I like to think that because I added coconut yoghurt to this milkshake that it's slightly healthier...but if you take into consideration the 6 scoops of ice cream it's probably not! but we all know if you want healthy recipes you don't come to my blog!


If you love coconuts and raspberries then what are you waiting for! I buy my coconut yoghurt from Tesco, it's their own brand and it's pretty tasty - it has little flakes of coconut throughout it.  If you don't happen to have any coconut yoghurt on hand but fancy whipping these up then just add a little bit more coconut milk for a stronger flavour and it should work just the same.


Coconut & Raspberry Milkshake:
Serves 1
From Cupcake Crazy Gem

6 scoops vanilla ice cream
3/4 cup coconut milk
1/2 cup coconut yoghurt
1/3 cup fresh raspberries

Add ice cream and coconut milk into the blender.
Add coconut yoghurt and then the raspberries.
Have a taste, if you want to add more raspberries for a stronger raspberry flavour then go ahead but if you want the coconut to shine through with just a hint of raspberry then pour into an ice cold glass and enjoy!
Sprinkle with shredded coconut and top with 3 of the juiciest raspberries!

Tuesday 22 May 2012

Kathi's Cookies: White Chip Double Chocolate Cookies


Sometimes you meet people and you just know you are going to be friends for life - that's how I felt when we met our wonderful American friends Kathi and Kurt.  We met them through our church when we were living in Reading 6 years ago.  I still remember the first time I met Kathi, I had moved away to university and was attending church in a new area and was feeling pretty shy about the fact I didn't really know too many people there.  Even though she was new too she came over and spoke to me, I remember being really grateful for that! Previous to that I had spent my time after church ended chatting to this 8 year old little boy James so I'm sure James was pleased to have me leaving him alone after that! 


After that we spent a lot of time together because Byron and Kurt were both involved with the Young Mens organisation in our church (for boys between the ages of 12-18) and Kathi and I were both leaders for the Young Women (girls between the ages of 12-18). Kathi is the kind of friend who is always thinking of others and doing kind deeds, she is always happy and joyful and gives the best hugs, I felt like during my time away at University she was like a second mom to me.  Halfway through our time living in Reading we moved to the other side of town which meant we had to start attending a different congregation of our church.  We still kept in touch with Kathi and Kurt, and one night when we found ourselves locked out of our house we didn't really want to call on anyone from our new church for help because we didn't feel we knew anyone well enough to do so.  Our parents lived too far away for us to travel to just for one night, so we called up our old friends and they were more than willing to help out - putting us up in one of their very beautiful guest rooms...I could have stayed all week! 

Kathi introduced me to the delights of apple crisp, fruit pizza...and these delicious cookies! She had made them one evening for a church event at her home and Byron and I couldn't stop eating them! I even think we snuck some home with us.  When I asked Kathi how she made them she told me they were just made with Nestle morsels and it was the recipe from the back of the bag! She told me next time she went back to America she would bring me some back...and true to her word she did! We were very excited to bake them up but were rather confused when our cookie dough was still pale in colour and not dark brown.  I called Kathi to see if I had somehow done something wrong and she laughed when she realised she had brought me the wrong Nestle morsels.  She had brought me the chocolate swirled chips when she should have brought me the white chips!

So the next time she went back to The States, she brought me some bags of white chips! and we were finally able to recreate the deliciousness of those cookies! I saved the bag which had the recipe on and kept it in my diary until recently when I was transferring all my random recipes into a proper recipe file, I came across this recipe and realised it had been far too long since I'd made some of these babies! 

So I rectified that! and really you don't need Nestle chips to make it, any old white chocolate chips will do! 

I had written this post last week and since then Kathi has proved once again why she is the best kind of friend to have! I was trying to source an American ingredient and couldn't find it anywhere in the UK, I really needed to call on an American friend to help me out and I knew I could depend on Kathi.  I messaged her asking if she didn't mind checking out some of her local shops, I wasn't even sure if they would have the product I wanted, and within 6 hours of me sending my original message she replied to tell me it was in the post and on it's way to me! 

Since our first meeting in Reading those 6 years ago, Kathi and Kurt moved to Singapore, we moved to Turks and Caicos, they moved back to Texas and now we will be heading off to Vancouver soon but I know this to be true...

'Though miles may lie between us, we're never far apart, for friendship doesn't count the miles, it's measured by the heart." - Anon -
and I know that we'll definitely see each other again, whether it's over some Southern style BBQ in Texas or over some milkshakes at a diner in Vancouver - hint hint! 


White Chip Double Chocolate Cookies (A.K.A Kathi's Cookies):
Makes 20
From Nestle Tollhouse via Kathi!

150g plain flour 
30g cocoa powder 
1/2 tsp bicarbonate of soda 
1/4 tsp salt 
113g unsalted butter, softened 
80g caster sugar 
50g packed dark brown sugar 
1/2 tsp vanilla extract 
1 egg 
 225g white chocolate chips


Preheat oven to 180 degrees C.
Combine flour, cocoa, bicarbonate of soda and salt in a small bowl.  
Beat butter and both sugars with vanilla extract in the bowl of a freestanding mixer until creamy.  Add eggs, one at a time, beating well after each addition.  Gradually beat in flour and stir in white chocolate chips.
Drop by well rounded ice cream scoops onto baking sheets. Bake for 9-11 minutes or until centers are set.  Cool on baking sheets for 2 minutes, remove to wire racks to cool completely.

Friday 18 May 2012

It's Cupcake O'Clock! Pimm's Cupcakes


This may or may not be the craziest frosting ever...certainly the craziest one I have ever made.  It is made up of four individual flavoured frostings, and so layering the piping bag is quite a feat in itself! Now bear with me while I tell you what the four flavours are; strawberry - yum! orange - not my favourite but I can bear with it! mint - we're getting a little bit out there now and wait for it ... cucumber! yes, cucumber frosting! I know what you're thinking - yuck! and that is what I was thinking too! but in a very weird way they just all work together.  I suppose it's the same way they all work in the actual Pimm's drink too, complimenting one another perfectly (or so I hear since I don't drink alcohol myself!).


So these cupcakes were the result of the baking day I had with some of my friends from uni months back that I've been telling you about for a while! They found and came up with the great idea to make Pimm's cupcakes! Well I think it was Katy's idea because our Irish friend Sarah had never heard of or tried Pimm's before and Katy thought that was a bit of a travesty that needed to be rectified! We kept a small portion of the batter back and made them just plain vanilla so that I could get to taste some of the deliciousness too! So if you don't like/drink alcohol you could do the same if you wanted to replicate these little beauties.


I've been waiting for so long to blog these because I wanted to post them when I felt like summer had officially arrived! Well it hasn't reached over 10 degrees at any point this past week here in Wales and there's been rain every day, I'm still wearing a coat so unfortunately summer definitely isn't here...but with the way things are going I don't know if it's ever planning to show it's face around here and these cupcakes were too cool not to be showcased so I caved.

I also felt like they would make a pretty fun bake for anyone celebrating the upcoming Queen's Jubilee since of course Pimm's is so quintessentially English! So I'm entering them into The Blogging Jubilee Baking Competition that is being run by Homemade By Fleur for a chance to win £100 of Amazon vouchers which are being provided by Appliances Online - just think of all the baking books you could buy with that prize! I'm excited with just the thought of it!


The girls especially loved getting stuck in to my massive box of sprinkles for decoration purposes! and we declared our baking day of fun a massive success.  I was definitely glad I had two helpers to bake up these cupcakes because I have a feeling by yourself making the four frostings would be a little time consuming but definitely worth it.  Don't skip out on any of the flavours, like cucumber, even though it seems odd I promise you it works! 


Pimm's Cupcakes:
Makes 24
From Good Food

250g golden caster sugar
250g margarine
250g self-raising flour
4 eggs, at room temperature
1 tsp baking powder
1 tsp vanilla bean paste or 2 tsp vanilla extract
120ml Pimm's

For the frosting:

800g icing sugar
500g butter

Strawberry: 16 Strawberries & 2 tbsp caster sugar
Cucumber: 60g cucumber, seeds removed & a drop of green food colouring
Orange: 1 orange, juice only & a drop of orange food colouring
Mint: 16 fresh mint leaves

Preheat the oven to 160 degrees C.  Line your baking tins with cupcake cases.
Whisk the eggs and sugar for at least 4 minutes with the whisk attachment of a free standing mixer and beat the air into the mix so it fluffs up.
Sieve the flour and baking powder and add it to the mixture a little at a time, alternating with chunks of butter, whisking the mixture each time to ensure a smooth texture.  When completely combined, mix in the vanilla and the Pimm's.
Fill the cupcake cases 2/3 full and bake for 15-20 minutes until they feel spongy and the tops have got some colour.
Leave in pans for 5 minutes and then transfer them to a wire rack to cool completely.

While they are in the oven, make a start on the frostings.
Mix up the icing sugar and butter to start with in a free standing mixer, do it in half batches so as not to completely cover your kitchen in icing sugar.  Once they are combined, mix for 5 minutes until light and fluffy.

Divide the frosting into four separate bowls.

Strawberry: Roughly chop the strawberries and put them in a pan along with the sugar stirring constantly. Once softened, mash gently with the back of a spoon and leave to soften a little more (about 2 minutes).  Pass the mixture through a sieve to remove the seeds.  Leave the mixture to cool, then mix into one portion of the frosting. (This made slightly more strawberry than was needed, so just add a little at a time until it gets to a stiff consistency...if you add it all the icing will be too runny to pipe).

Cucumber: Cut the skin off the cucumber, chop it into very fine pieces and mix into one portion of the frosting.  Add a small amount of green, keep it quite pale.  

Orange: Blend the juice and zest into one portion of the frosting, again go easy as adding too much depending on the size of the orange you juice may make it too runny.  Add a small amount of orange food colouring to give it a pale orange colour.

Mint: Chop very finely and add to the frosting.  You can add green colouring if you want but we opted to keep ours the natural green that the mint leaves had made it.

To pipe: Place a large piping bag with an open star nozzle in a tall glass, spreading the top of the bag over the top of the glass.  Using a teaspoon, take a scoop of one of the frostings and gently push it down one side of the piping bag.  Repeating with the other 3 frostings until you have filled the bottom of the piping bag and the frosting is divided into quarters.  You can then use tablespoons to fill the rest of the piping bag with the rows of frostings.  Squeeze any air out of the bag and frost a little onto a piece of parchment paper first until all 4 colours start to swirl together.  Pipe your swirls on your cupcakes.

Finish with fresh slices of orange, cucumber, mint or strawberry or just for fun - with some sprinkles! 
Eat and enjoy! 

Friday 11 May 2012

Hawaiian Haupia Chocolate Pie - An Alphabakes Challenge!


This is the first Alphabakes challenge where I have baked something especially for it.  The past few times I just happened to bake things earlier in the month and then found that they fit in with the random letter selected! This month I knew that wasn't going to happen since the letter was H! The only ingredients that came to mind was honey or hazelnuts and I don't like either of those.  I flicked through my recipe books and came across hibiscus cupcakes from Martha Stewart but I have a general rule that you will never find me baking with anything that should be found in my bath e.g rose or lavender so that ruled out hibiscus. 

I decided to turn to geography! and decided I could either bake something up from Haiti or Hawaii and pass it off as an 'H' bake! Fortunately it didn't take me long to stumble upon the fabulous sounding Haupia Chocolate Pie.  Of course with my love for coconut, it was a given that this was going to be my selected bake! Haupia is a traditional Hawaiian dessert - it is a coconut flavoured cube of gelatin and apparently no luau is complete without it! In more recent times the traditional dessert has been incorporated into a pie.  Go to any Mcdonald's in Hawaii and you won't be greeted with the apple pies we know but instead you can buy Haupia pie!

The idea for a Haupia Chocolate Pie originates from Ted's Bakery so if you ever find yourself in Hawaii and want to try the real deal that's the first place you should head to! Failing that, you could use the recipe below and bake up a very tasty pie yourself! 

The Haupia Chocolate Pie consists of a sweet pastry crust, a layer of chocolate and coconut Haupia, a layer of original Haupia finished off with some sweetened whipped cream on top. 

I decided to finish mine off with some toasted shredded coconut and some chopped up Lindt coconut creation milk chocolate - currently my favourite ever chocolate, but more about that in a future post! 

I decided since most of you have probably never heard of Haupia Chocolate Pie before that I would stop being lazy and take a few pictures of how to make one! 

I discovered during this bake that pastry and I don't get along.  I had to literally fight with my pastry.  I bought the ready to roll out stuff as the day before I baked this I'd baked an Apple Pie for my dad's birthday and made the pastry from scratch so I was all pastried out by then (and for those curious to know you can send Apple Pies in the post and they do reach the recipient in perfect condition - how cool!)
Anyway back to the pastry...everytime I rolled it out, it just pinged back into the smaller size pastry sheet I had started with, it was a pain and a half - hence why I didn't take any pictures at this point, it was too stressful! 

So after you've baked your pie crust, mix your milk, coconut milk and sugar in a saucepan until they start to boil....


meanwhile dissolve your cornflour in some water in a separate bowl.  


Add the cornstarch slowly, whisking it in until the mixture starts to thicken.  When it's thick enough to not drip off your spoon it's ready.


Divide the mixture into two bowls.  I decided you can never have enough coconut and so I whisked some desiccated coconut into the plain coconut half.


Melt some chocolate in a heatproof bowl above boiling water.


Stir it into the other half of the Haupia filling.


First, layer your pie crust with the chocolate filling.


Then, add the coconut filling.


Whip up your cream and spread that over the top. (I forgot to take a pic of that!)
Take this amazing chocolate...


and chop it into small chunks - look at that delightful coconut filling in there! 


Finish by sprinkling toasted coconut and chopped up chocolate on top of your pie.


  Devour your pie, and as you do so wonder why you don't live in Hawaii because if you did you could be enjoying desserts like this every day whilst basking in sunshine...instead of eating them in North Wales with the rain pouring down outside! 

Haupia Chocolate Pie:
Serves 12-14

1 (9 inch) unbaked pie crust (I used ready to roll sweet shortcrust pastry)
225ml semi skimmed milk
400g (1 tin) coconut milk
175g caster sugar
215g water
60g cornflour
25g desiccated coconut
225g plain chocolate, broken into chunks
325g double cream
55g caster Sugar

To decorate:

toasted shredded coconut
Lindt creation coconut milk chocolate, finely chopped

Preheat oven to 180 degrees C. Bake crust for 15 minutes or until golden brown.  Set aside to cool.

In a medium saucepan, whisk together milk, coconut milk and sugar.  In a separate bowl, dissolve the cornflour into the water.  Bring coconut mixture to a boil.  Reduce to simmer and slowly whisk in the cornflour.  Continue stirring mixture over low heat until it thickens, about 3 minutes.

In a heatproof bowl set above a pan of simmering water, melt chocolate chunks.  Divide the coconut pudding evenly between two bowls (I even got out my electronic scales to do this only to find out halfway through the process that my battery had run out! so eyeballing it is fine if you have to!) Mix the melted chocolate into one half, and the desiccated coconut into the other half.  
Spread the chocolate filling onto the bottom of the pie crust, and the coconut filling on top of that.  Refrigerate for one hour.

Whip the cream with the sugar using the whisk attachment of a free standing electric mixer until stiff peaks form.  Toast shredded coconut in the oven under the grill for 3-4 minutes watching closely so as not to burn it.  Chop up chocolate chunks into very small pieces.  

Remove the pie from the fridge and layer the cream on top of the pie.  Sprinkle with the shredded coconut and chocolate chunks if you so desire.


I am entering this into the Alphabakes challenge this month being hosted by Caroline Makes.  If you want to join in check The More Than Occasional Baker's blog next month to see what the random letter will be.

Tuesday 8 May 2012

Triple Chocolate & Mint Choc Chip Layer Cake


So a few months back a couple of my friends from my course at uni suggested we should have a baking day of fun, a day where we would forget essays, lectures and dissertations, and just bake! 
I, of course, thought that sounded like an awesome idea! So we set a date, and just a few days before Sarah let slip that it was her birthday the day after our baking day of fun! How sneaky is that?! 
So naturally I had to bake her a cake! She was going to be miles from her home (back in Ireland) with none of her loved ones there to share it with her so we wanted to make a fuss of her and cake is always the best present I can think of!

A few days before we had been looking at my blog together in the computer rooms deciding what we should bake on our baking day.  Sarah had noticed the Peppermint Crisps I had used on my lamingtons and said she had tried them before when she'd visited Australia.  I subtly was trying to find out what her favourite flavours were, but she wasn't giving anything away, saying that she liked everything! 


So in the end I began with Peppermint Crisps as my inspiration and evolved them into a 3 layer chocolate cake, with layers of mint choc chip frosting in between, covered in choco-mint Aero frosting with Peppermint Crisp to decorate! 


Clearly my piping skills leave something to be desired! In the past month I have discovered piping candy melts makes for the best way to do wording on cakes, but this was piped before I made that discovery! 


Here's the birthday girl blowing out her candles! 
...and here's a slice of the cake so you can see inside! I used my absolutely favourite go to chocolate cake recipe because it always turns out so rich and moist.  The mint choc chip frosting paired well with the rich chocolatey layers of cake and the super smooth chocolate frosting with just a hint of mint from the melted Aero really brought the whole thing together! and I just love that stained glass like effect that the chopped up Peppermint Crisps on top add to the cake! 


Triple Chocolate & Mint Choc Chip Layer Cake
Serves 12-14
Adapted from Cupcakes from the Primrose Bakery

For the cake:

230g good quality dark chocolate (70% cocoa solids - I used Lindt)
170g unsalted butter, at room temperature
350g light soft brown sugar
3 large eggs, free range or organic, separated
370g plain flour, sifted
1 1/2 teaspoons baking powder
1 1/2 teaspoons bicarbonate of soda
1/2 teaspoon salt
500ml semi skimmed milk, at room temperature
2 teaspoons good quality vanilla extract

Preheat oven to 180 degrees c.
Break the choc into pieces and melt in 30 second intervals in a glass bowl in the microwave.  Set bowl aside to cool.
Cream the butter and sugar in a large mixing bowl for 3-5 minutes until the mix is pale and smooth.
Put the egg yolks in a separate bowl and beat them for several minutes, slowly add the egg yolks to the creamed butter and sugar and beat well. 
Add the cooled chocolate to this mixture and beat well again.
Combine the flour, baking powder, bicarbonate of soda and salt in a separate bowl.  Combine the milk and vanilla extract in a jug.  Add one third of the flour to the creamed mixture and beat well.  Pour in one third of the milk and beat again.  Repeat these steps until all the flour and milk have been added.
In a clean bowl whisk the egg whites until soft peaks start to form.  Carefully fold the egg whites into the main batter using a metal spoon (Do not beat or you will take the air out of the mixture).  
Divide the mixture evenly between three 8" tins and bake for about 30 minutes.
Insert a skewer in the centre of one of the cakes, it should come out clean if cooked.  Leave to cool.

For the mint choc chip filling:

1 cup unsalted butter, softened
1 tsp vanilla extract
1 tsp peppermint extract
5 cups icing sugar
4 tbsp semi-skimmed milk
1 cup plain chocolate, chopped coarsely
a few drops of green food colouring

While the cake is cooling make the filling. 
Using an electric mixer, cream together the butter, vanilla and peppermint extract.
Add in the icing sugar one cup at a time, and then add in the milk, one tablespoon at a time until frosting is smooth and desired consistency has been reached.  It will be quite a soft frosting (not one that could be piped).
Stir in the food colouring (if desired) and then fold in the chocolate chips.

For the Mint Aero chocolate frosting:

100g good quality dark chocolate (70% cocoa solids - I used Lindt)
75g Mint Aero chocolate
225g unsalted butter, at room temp
1 tablespoon semi-skimmed milk, at room temp
1 teaspoon good quality vanilla extract
250g icing sugar, sifted

Melt both chocolates in 30 second intervals in a glass bowl in the microwave until smooth.  Leave to cool slightly.  In a large mixing bowl beat the butter, milk, vanilla and icing sugar until smooth - this can take several minutes with an electric hand mixer.  
Add the melted chocolate and beat again until thick and creamy.  

To Assemble:

2 Peppermint Crisps

Spread a layer of mint choc chip filling on top of one of the chocolate cakes.
Stack another chocolate cake on top and add another layer of mint choc chip filling.
Put the final chocolate cake layer on top.  
Frost the sides and the top of the cake with the Mint Aero chocolate frosting.
Chop up Peppermint Crisps using a sharp knife.
Sprinkle the Peppermint Crisp crumbs around the top of the cake.
Pipe on your message.

LinkWithin

Related Posts with Thumbnails